 Core Principles for School Water-Based Activities
These are the non-negotiable safety principles for all water-based activities: canoeing, kayaking, stand-up paddleboarding, and other paddling. These must be in place before any group enters the water. For broader context, see Health & Safety Planning for School Camps.
Core Water Safety Principles
1. PFDs (Personal Flotation Devices) are non-negotiable
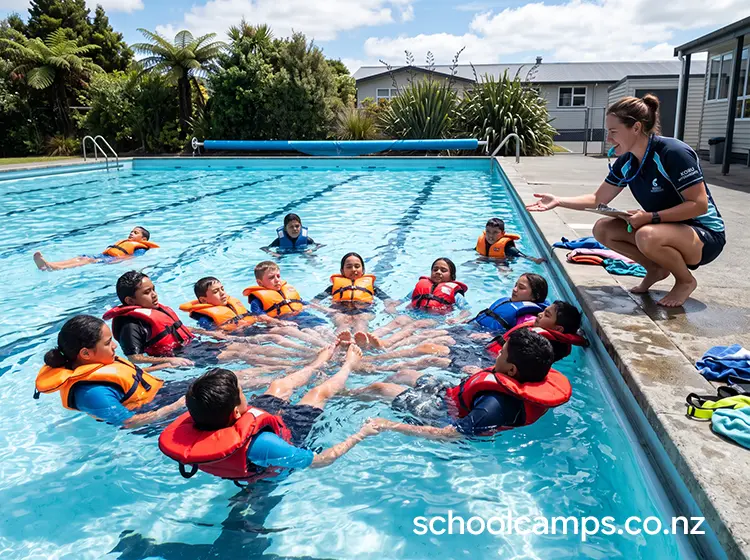
All students and adults wear properly fitted PFDs at all times on or near water. PFDs must meet New Zealand safety standards (AS/NZS 4758). Check for damage before each use: tears, broken straps, missing buckles. Proper fit: snug but not restrictive, straps adjusted, ability to swim and move freely. Students must keep PFDs fastened: no loosening or removing on water.
2. Supervision must be active and strategic
Maintain appropriate ratios (typically 1:6–1:10 depending on conditions and student experience). Position adults strategically: at least one on shore, one on water in support craft if available. Maintain visual contact with all students. Regular headcounts every 10–15 minutes. At least one rescue-capable person present.
3. Know your water conditions
Water temperature: be aware that NZ water is cold year-round, even on warm days. Wind speed: monitor before and during activity: generally unsafe above 25 km/h for beginners. Current and tides: understand flow patterns, time estuarine activities for slack tide. Depth: know where it’s deep enough to paddle but not so deep students feel unsafe. Hazards: identify submerged logs, rocks, weeds, drop-offs, or boat traffic.
4. Establish clear boundaries and communication
Define paddling area using visible landmarks (buoys, jetties, tree lines). Establish whistle signals: one blast = attention/stop, three blasts = emergency return to shore. Carry waterproof communication devices (two-way radios or phones in dry bags). Visual signals: raised paddle = need help, waving arms = emergency. Review signals before entering water; students should demonstrate understanding.
5. Plan for cold water immersion
Cold water shock is the immediate danger (gasping, hyperventilation, disorientation). Hypothermia can develop within 30 minutes in NZ water temperatures. Proper clothing: quick-dry layers, never cotton; wetsuits for extended exposure or cold conditions. Have complete dry clothes and warm drinks available on shore. Monitor for signs: shivering, confusion, lethargy, loss of coordination.
Capsize Procedure
Teach this procedure on shore before entering water:
- Stay calm. Your PFD will keep you floating. Take a breath and orient yourself.
- Stay with your craft. Do not try to swim to shore. The canoe/kayak/SUP is bigger, more visible, and provides flotation.
- Signal for help. Raise your paddle or wave your arms. Make noise if instructors are nearby.
- Wait for assistance. Instructors will come to you with support craft. Follow their instructions for re-entry or tow to shore.
Weather Monitoring and Decision-Making
Before activity: check detailed forecast 24 hours before; recheck the morning of the activity; have clear thresholds for safe conditions.
During activity: continuously monitor conditions; one person designated as decision-maker with authority to modify or cancel; have a clear recall protocol if conditions deteriorate.
Red flags: immediate evacuation required: lightning observed or thunder heard; wind creates whitecaps or students struggling to control craft; heavy rain reducing visibility below 100 metres; any student showing hypothermia symptoms; group becomes separated beyond visual contact.
Emergency Response
First aid and medical: at least one person carries a comprehensive first aid kit; know the location of nearest medical facilities and estimated response times; have student medical information accessible (allergies, conditions, medications); have a protocol for calling emergency services if needed.
Communication plan: emergency contact list including parents, school leadership, emergency services; waterproof emergency communication device; PLB (Personal Locator Beacon) for remote locations; clear protocol for who contacts whom in different emergency scenarios.
Risk Assessment Essentials
Before any water activity, complete a risk assessment covering:
- Hazards: what could cause harm? (capsize, cold water, weather changes, separation, equipment failure, sun exposure, fatigue)
- Risks: how likely and how serious is the harm?
- Controls: what will you do to reduce or eliminate risk? (PFDs, supervision ratios, weather monitoring, briefings, boundaries, support craft)
- Response: what’s your plan if something goes wrong? (capsize response, evacuation procedure, medical emergency protocol)
Additional Safety Resources
- Water Safety New Zealand (WSNZ): guidelines for school water activities: watersafety.org.nz
- Education Outdoors New Zealand (EONZ): EOTC Safety Management Plan and Toolkit, professional development and resources: eonz.org.nz
- Maritime NZ: safety regulations and PFD standards: maritimenz.govt.nz
- NZ Outdoor Instructors Association (NZOIA): qualification standards for outdoor instructors: nzoia.org.nz
What a Safe Session Looks Like
You’ll know safety is in place when: all students and adults wear correctly fitted PFDs before approaching water; a clear verbal briefing is completed and students can repeat back key safety signals; boundaries are visible and understood, with regular headcounts occurring; adults are strategically positioned with clear roles; students are demonstrating appropriate behaviour: listening, following instructions, supporting partners; weather conditions are stable or improving, with the decision-maker actively monitoring; emergency equipment is accessible and tested; and everyone knows what to do if someone capsizes.
These safety principles are the non-negotiable baseline for any school water activity. When properly implemented, they allow students to challenge themselves and learn in an environment where risk is managed, not eliminated.
Related Resources
For a template to build your own written safety plan around these principles, see our free RAMS Safety Management Plan template.

Leave a Reply
You must be logged in to post a comment.