 This guide covers activity-specific elements of orienteering. For broader topics that apply across land-based activities, see our standalone reference guides:
- Working with Outdoor Education Providers
- Parent Communication for Land-Based Activities
- Student Preparation for Land-Based Activities
- Behaviour Management Outdoors
- How to Debrief Outdoor Experiences
- Land and Bush Safety Foundations
1. Quick Overview
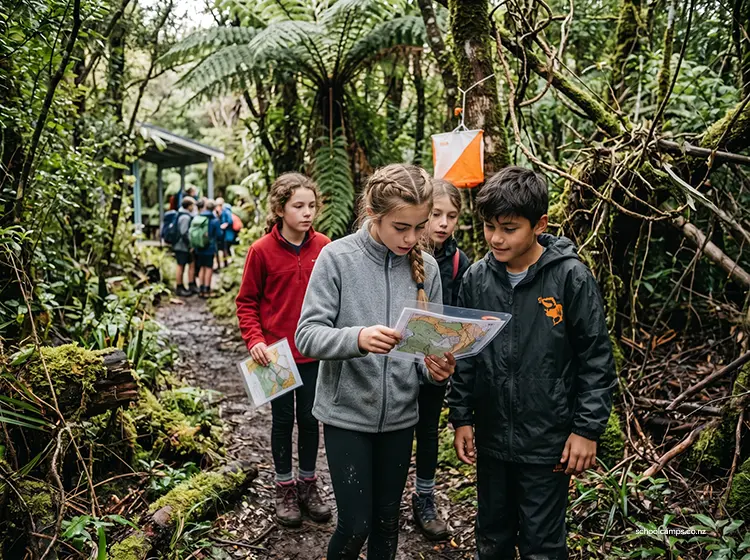
Orienteering (navigating between marked control points using a map and, at higher levels, a compass) is one of the few outdoor activities a school can run entirely itself, using a permanent course at a local park, school grounds, or a camp venue, or a temporary course set up for the day. Orienteering New Zealand maintains resources and, in many regions, permanent courses schools can use for free or a small fee.
Schools choose it because it directly supports curriculum links to navigation, mathematics (scale, bearings) and geography; it scales easily from a simple string-course for younger students to a genuinely challenging cross-country course for older ones; and (unlike many outdoor activities) it can be run without a specialist external provider if a teacher has basic map-reading confidence.
Typical duration options
- Taster session (45–60 minutes): a short, marked course in a confined, safe area (school grounds or a local park) focused on basic map symbols and following a set route.
- Half-day session (2–3 hours): a proper permanent orienteering course with multiple control points, working in pairs or small groups, with an instructional session on compass bearings beforehand.
- Full-day session (4–6 hours): a longer, more technical course (forest or unfamiliar terrain), an introduction to route-choice strategy, and potentially a relay or score-orienteering event format.
2. Learning Outcomes Teachers Can Actually Use
Personal skills: builds independence and self-reliance in decision-making; develops patience and persistence when a control point isn’t found immediately; practises staying calm and methodical rather than panicking when temporarily unsure of location.
Social skills: communicates and negotiates route choices with a navigating partner; supports a partner who’s struggling with map reading rather than taking over entirely; demonstrates honesty around course completion and control punching.
Outdoor/technical skills: reads and interprets a topographic map (symbols, contour lines, scale); uses a compass to take and follow a bearing; relates map features to the physical terrain in real time (“thumbing” the map, orienting it to the landscape).
Thinking skills: plans an efficient route between control points before setting off; adapts a plan when a feature doesn’t match the map or a control isn’t where expected; makes real-time decisions under mild time pressure; develops spatial reasoning and scale estimation.
Wellbeing: builds genuine confidence in independent navigation, a life skill with clear application beyond school; provides a low-intensity but genuinely engaging physical activity suited to a wide range of fitness levels; the “puzzle-solving” nature appeals strongly to students who don’t connect with more conventional sport.
3. Best Year Levels and Group Sizes
Suggested year levels
- Year 4–6: a simple, marked “string course” or picture-based course in a confined area (school grounds), with no compass work: following a set route using pictures or simple symbols.
- Year 7–8: an introduction to real orienteering maps and basic compass bearings, on a permanent course in a park or reserve, working in pairs.
- Year 9–13: full topographic map and compass navigation on a proper orienteering course, working individually or in pairs, with route-choice strategy as a genuine skill focus.
Group size guidance
- Whole class (25–30 students): works well split into pairs or small groups of three, staggered onto the course at intervals to avoid groups simply following each other.
- Small groups (8–12 students): ideal for closer teacher supervision and more individualised navigation instruction before setting off.
- Very large groups (60+): needs a larger course area and staggered starts, or multiple simultaneous courses of varying difficulty.
Ratios and supervision
Orienteering ratios depend heavily on course area and student navigation experience. As a general guide: 1:15–1:20 is workable for a confined, well-marked course area where students stay in visual or shouting range of a supervising adult; this tightens to 1:8–1:10 for a larger, forested course where groups are genuinely out of sight for periods, and a clear boundary and time-check system becomes essential at that scale.
4. Working with Providers
Deciding whether to run teacher-led or provider-led sessions, questions to ask providers, and what teachers should still do when working with external instructors:
See: Working with Outdoor Education Providers
Orienteering is one of the more teacher-led-friendly outdoor activities: many schools run it themselves using a local permanent course and resources from Orienteering New Zealand, which also lists local clubs able to help set up an event or provide coaching for a more ambitious session.
5. Planning Checklist
Permissions and communications
For parent letter templates, consent requirements, and addressing common parent concerns, see Parent Communication for Land-Based Activities.
Skills and fitness preparation
For general pre-camp confidence-building, see Student Preparation for Land-Based Activities. A classroom session on map symbols, scale, and basic compass use before the day makes a significant difference to how much of the outdoor session is genuine navigation practice rather than instruction.
Gear and clothing
What’s provided (typical setup): course maps, compasses (for older groups), and control cards/punches or electronic dibbers at each control point.
What students bring: enclosed shoes suited to the terrain (trail or sports shoes for park courses, sturdier footwear for forest courses), weather-appropriate clothing, a water bottle, and a whistle if working independently in a larger course area.
Weather management: orienteering can generally proceed in light rain, but poor visibility (heavy fog or storm conditions) or genuinely hazardous terrain conditions (flooded creek crossings, storm-damaged tracks) should trigger a course change or postponement.
Accessibility and inclusion
Confidence levels: pair a nervous navigator with a more confident one rather than leaving anyone to navigate entirely solo for a first attempt; offer a simpler, shorter course option alongside the main one.
Neurodiversity: give clear, step-by-step instruction on map orientation and compass use before setting off; use a consistent, simple checklist format for course instructions; allow extra time for students who process visual/spatial information differently.
Physical needs: course routes can often be adapted to avoid particularly difficult terrain for students with mobility considerations: check the specific course layout in advance and adjust control points if needed.
Keeping everyone involved: rotate map-reading and “leg-work” (physically moving to the next point) roles within a pair so both students get genuine navigation practice; celebrate accurate navigation and good decision-making over simply being fastest.
6. Safety, Risk, and Good Practice
Hazards to think about: students becoming genuinely lost or disoriented, particularly in larger or forested course areas; trips and falls on uneven terrain; students leaving the agreed course boundary; weather changing during a longer session; road crossings if the course area is near traffic; students becoming separated from their navigating partner.
Key controls: a firm, clearly explained course boundary that must never be crossed; a fixed return time that every group or pair must meet, with a clear consequence-free process for reporting “we couldn’t find control X” rather than continuing to search indefinitely; a check-in system at a base point for larger courses; whistles carried for larger, more remote courses as a “I need help” signal.
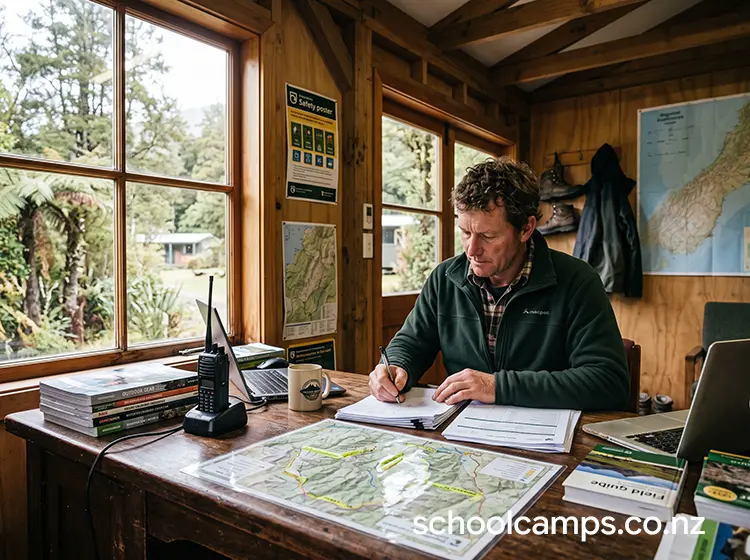
Roles on the day: a designated decision-maker (lead teacher or provider) stationed at a base point, tracking which pairs are out and their expected return time; a means of communication (phone, radio) for any group needing help; a clear, rehearsed process for what happens if a pair is overdue.
When to stop or switch plans (red flags)
Stop immediately if: a pair or group is overdue beyond the agreed return time (activate your search/check plan immediately rather than waiting); weather deteriorates significantly (poor visibility, lightning, heavy rain making terrain hazardous); a student is genuinely distressed or disoriented; the course boundary has been breached.
Switch to Plan B if: a pair can’t find a specific control after a reasonable effort (they’re taught in the briefing to move on or return to base rather than searching indefinitely); conditions are marginal (shorten the course or move to a smaller, more contained area); a student wants to stop partway (a supervising adult walks them back to base).
What a safe session looks like
- ✓ Every pair or group understands the course boundary and the fixed return time before setting off
- ✓ A base point tracks who is out on course and when they’re expected back
- ✓ Students know to return to base (not keep searching) if a control can’t be found
- ✓ No pair or group is ever truly out of contact: a phone, radio or check-in system is in place
- ✓ An overdue group triggers an immediate, rehearsed response, not a wait-and-see approach
- ✓ Weather and terrain conditions are actively monitored throughout the session
7. Site Selection and Conditions
What makes a location suitable: a mapped area with a genuine permanent orienteering course (school grounds, local park, or a registered course listed through Orienteering New Zealand), clear natural or physical boundaries, and terrain matched to your group’s navigation experience.
Deal-breakers: a course area without clear boundaries near roads or hazardous terrain; no accurate, current map available; an area too large for your supervision plan to genuinely track groups.
Travel time and logistics: many schools can run a basic session on their own grounds at no travel cost; a proper permanent course at a local reserve is often a short drive and worth the improved terrain variety for older students.
Toilets, shelter, water access: confirm facilities at the course’s base area, particularly for a longer session.
“Plan B” locations: a shorter, more contained course (or the school grounds itself) is the standard fallback for deteriorating weather or a group needing a simpler challenge.
8. Session Structure Teachers Can Follow
This run-sheet works for a half-day session: adjust timing for tasters or full days.
1. Arrival and set-up (15 minutes): headcount; course boundary and base point established and clearly explained.
2. Briefing (20–30 minutes): map symbols, scale, and (for older groups) compass bearing instruction; the return-time and “can’t find it, come back” rule explained clearly; pairs or groups formed.
3. Practice control (15 minutes): the whole group finds one easy, nearby control together to confirm everyone understands map reading and control punching before setting off independently.
4. Main course (60–90 minutes): pairs or small groups navigate the course at staggered start times, checking in at base on completion.
5. Regroup and results (15 minutes): times and control cards checked in; quick discussion of route choices made.
6. Debrief (10–15 minutes): quick circle debrief (see How to Debrief Outdoor Experiences); teacher highlights good navigation decisions and connects to curriculum focus (maths, geography, independence).
9. Behaviour Management
For strategies on managing risk-takers, refusers, disengaged students, and creating positive reinforcement outdoors, see Behaviour Management Outdoors. Orienteering needs a particularly firm, early line on any pair considering leaving the agreed boundary “to explore”: this is a straightforward safety issue, not simple mischief.
10. Reflection and Debrief
For debrief frameworks, facilitation tips, curriculum links, and reflection techniques, see How to Debrief Outdoor Experiences.
11. Common Issues and Fixes
Fear and reluctance
Issue: a student is anxious about navigating independently. Fix: pair them with a confident, patient partner for their first course, and let them take on the map-reading role only once comfortable.
Issue: a pair becomes genuinely disoriented mid-course. Fix: they’re taught in the briefing to retrace their last known confident point or return directly to base: never to keep pushing forward hoping to relocate.
Pacing issues
Issue: some pairs finish very quickly, others take much longer. Fix: have an extension option (an extra control or a “how many can you find in the time left” format) ready for fast finishers, and a firm return-time cut-off for everyone regardless of progress.
Issue: a pair can’t find a specific control. Fix: the briefing rule applies; move on to the next control or return to base rather than searching indefinitely.
Equipment and technique
Issue: a compass reading doesn’t match the map. Fix: stop, re-orient the map to a known feature, and recheck rather than continuing on a guess.
Issue: a control card or electronic dibber isn’t working. Fix: note it and continue; a spare recording method (writing down the control code) is a simple backup.
Group management
Issue: a pair splits up to “cover more ground.” Fix: an immediate, firm reminder that pairs stay together at all times: this is a non-negotiable safety rule, not a suggestion.
12. Activity Variations and Extensions
Easier version (confidence-building): a picture-based or string course in a confined, fully visible area with no map-reading or compass skills required.
Standard version: a permanent course with proper topographic maps, worked in pairs, with basic compass bearing instruction.
Challenge version: a longer, more technical course in unfamiliar terrain; individual (not paired) navigation for experienced students; a score-orienteering or relay event format; for students wanting to continue, a pathway toward club-based orienteering through Orienteering New Zealand.
13. Cost and Resourcing Notes
What tends to drive cost:
| Cost driver | Typical range |
|---|---|
| Course/map access fee (permanent course) | $0–$10 per student |
| Compass hire (if not school-owned) | $2–$5 per student |
| Club-run coached session or event | $10–$20 per student |
| Transport to venue (if off school grounds) | $150–$400 per day |
Ways to keep it affordable: running the session on school grounds using a teacher-designed course rather than travelling to a permanent one; reusing a set of school-owned compasses across year groups rather than hiring; contacting a local orienteering club, which can often provide low-cost coaching support for a first attempt.
Estimated total costs per student: $0–$5 for an on-site, teacher-led session; $15–$30 including transport and access fees for an off-site permanent course.
14. Next Steps for Schools
Ready to bring orienteering to your students? Here’s your checklist:
- Check readiness: review this guide and confirm whether you’ll run this in-house or with support from a local orienteering club.
- Confirm venue: check Orienteering New Zealand for a permanent course near you, or design a simple course on your own school grounds.
- Brief parents: use the template in Parent Communication for Land-Based Activities to inform families well in advance.
- Consider a provider or club (optional): for a first attempt, or a more technical course, contact a local orienteering club via Orienteering New Zealand: use the questions in Working with Outdoor Education Providers if engaging outside coaching support.
- Run a classroom prep session: teaching map symbols, scale and basic compass use before the day makes a real difference to how much of the outdoor session is genuine navigation practice.
Leave a Reply
You must be logged in to post a comment.